
Coasters
My sister wanted to do a DIY Christmas exchange last year so these coasters are what I made for her. They were easy to make and can be easily customized.
For Mother's Day, my sister-in-law received one of these from my niece with a picture on it, so you can do this with photos as well.
I followed this tutorial, which has much better photos than I do. I wish I would have taken more photos, especially of the finished product. They turned out nicely and the only tip I would give is to make sure you mod podge the edges well so that they do not peel up.
Supplies:
- (4) 4″ x 4″ pieces of paper (from Hobby Lobby)
- (4) 4.25″ x 4.25″ tiles (from Home Depot)
- Mod Podge
- Rustoleum Crystal Clear Enamel
- Foam brush
- 3/8″ self adhesive felt pads
- Something to cut your paper with
 |
| The supplies you will need for the project |
 |
| How the modge podge looks when you apply it, but it will dry clear |
 |
| What they will look like once they are done (Image) |
Hot cocoa + baileys
I wanted to give my sister/brother-in-law something to put on their new coasters, so I also made these mason jars for them. The jars had hot cocoa with a little bottle of baileys attached, a perfect winter beverage.
Supplies:
- Mason jar
- Hot cocoa
- Marshmallows
- Baileys (optional)
- Twine
- Fabric swatch
- Fill your mason jar with hot cocoa and marshmallows
- Cut a fabric swatch to go over the lid (you can also put the fabric over the rim and secure it with the twine)
- Attach the baileys with twine
- Done!


 |
| This was my inspiration for this project (Image) |
For Mia's birthday party, I made the tutu for her outfit. Making a tutu is way easier than you would think and much cheaper than buying one already made.
Supplies:
- Crochet headband (you can find these in craft stores, I used these)
- Tulle (I waited until it was 1/2 off at Hobby Lobby!)
- Scissors
- Book (it helps to see stretch out the headband to see the "holes")
I used this tutorial to help guide me. Since the tutorial only used one color I did have to add the step of counting the holes in the headband to figure out how many of one color I should go across before switching to the next color.
With the headband I used, there were 38 "holes," so I did 5 pieces of tulle of red, green, and blue and 4 of yellow. I did less yellow since the band was yellow. The yellow was also a thicker tulle and had glitter, which was a BIG mistake. There. was. glitter. everywhere! I will never do that again.
So basically I would do 5 across of one color (or 4 of yellow) and then move on to the next color (you repeat this pattern twice to go all the way around the headband)...make sense? If it doesn't make sense, just send me a message/email and I would be more than happy to clarify!

I used this chart to help determine how long I should cut the tulle. I cut my tulle into 18" strips so that when they were folded they would be 9" long for the skirt.
 |
| (Image) |
This was the first layer of tulle on the first row of "holes"

This was after the second and final layer of tulle. You could keep going if you want a fuller tutu. You accomplish this by going up a row and starting the process over on that row of "holes."

The finished product

 |
| The picture is blurry, but it shows the tutu the best |
Cupcake stand
This was another simple DIY project that added just a little something to the cupcake holder at Mia's Uno themed birthday party (read about it here). I started with a plain (cheap) cupcake holder I found on Amazon.

I put double sided tape around the edges of the cupcake stand.

Then adhered mini Uno cards to the tape...that's it! I found the mini Uno cards here.

The finished product at her party:

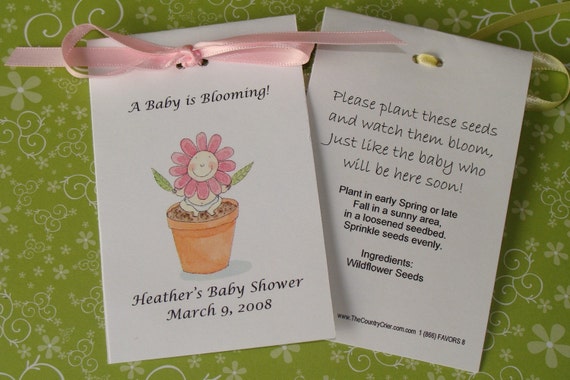
Wildflower seed favors
I had a lot of fun coming up with these favors for my friend's bridal shower. We went with a "Love is in bloom" theme and gave wildflower seeds for the favors. You can read about the shower here.
Flower (or vegetable/herb) seeds can be given for bridal showers, baby showers, weddings or really any party. I saw this cute idea for a baby shower:
 |
| Image |
- Bags/Envelopes (Coin envelopes work well; found here)
- Flower/vegetable/herb seeds
- Address labels (I used the standard size, but the size of your envelope will determine the size you need)
- Double sided tape
- Printer
I was lucky and found these cute envelopes at Hobby Lobby. They had many different designs and were on the stamp aisle.

I started by making the label. I used a template for the address label (I used this address label and this template). I picked a font and typed what I wanted on the label. After I had everything just right I copy and pasted it to the rest of the labels. Then I printed them off. It takes no time at all!

I placed the address labels on the envelopes.

Then filled the envelopes with wildflower seeds (I bought this bag of seed from Hope Depot) and sealed the envelopes with double sided tape.

This is the finished product at the bridal shower. I bought these containers and frame from the Dollar tree. Inside the frame it says "Please plant these flowers and watch them bloom just like the love of the bride and groom."

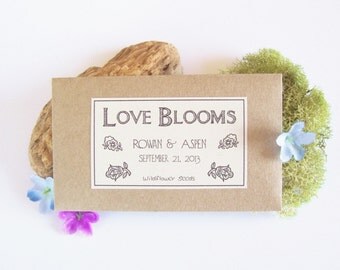
This was my initial inspiration from Etsy, they were out of their minds for how much they wanted for these envelopes. So I decided to make my own!
 |
| Image |
I hope I have given you some ideas for some DIY projects of your own or inspired you to create some of the stuff you have pinned on Pinterest. Ha...I need some inspiration to actually cook some of the recipes I have pinned! Let me know if you have any DIY ideas you want to share, I would love to hear about them.
The coasters were awesome and sit proudly on our ottoman tray in our living room! The cocoa didn't make it quite as long... so yummy! lol :) Great job!
ReplyDeleteYay! I'm so glad you liked them!
Delete